Chicken Kiev
Introduction & method
Back in the 1970s and 80s, when Britain was discovering a whole new world of cuisine, chicken Kievs were on the menu of every restaurant that thought itself the slightest bit sophisticated. Sadly, you almost never see them now (although I suspect you can still buy rubbishy frozen ones). But do not despair - you can make them yourself, it's not really difficult, and they will be the best chicken Kievs you've ever had.
To make the garlic butter filling for the chicken Kievs
If your butter is too hard to easily squash with a fork, microwave it for 20 seconds. Peel and finely chop the garlic, finely chop the parsley. Mix the garlic and parsley into the butter. Take a piece of plastic film (cling film), and place the garlic butter onto it. Form into a sausage-like roll. Tightly wrap the sausage and place in the freezer for 20-30 minutes - you want it to firm up but not freeze solid.
Prepare the chicken breasts for the chicken Kiev
Trim off any excess fat round the edges of the breasts. With a sharp knife, make a cut from the side of the breast to form a pocket. Be careful not to cut through the edges of the breast. Put the chicken breasts into the fridge until your garlic butter is ready.
Assemble the chicken Kievs
When the butter sausage is firm, unwrap it, cut it in half, and insert each half into the pocket you cut in each breast. Rub flour onto the open edges of the pocket, and then brush with a little beaten egg. Press the open edges together to seal them.
Coat the chicken Kievs in breadcrumbs
Roll each breast in flour until it is fully coated. Pour the beaten egg onto a plate and place a floured breast into it. Brush the egg all over the breast, and then roll it in breadcrumbs to get it fully coated. If you like, you can repeat the egg-and-crumb procedure to get an extra-crispy coating. Put the Kievs into the fridge for at least half an hour, or until you are ready to cook them.
Cook the chicken Kievs
Kievs are normally shallow-fried. In a frying pan, heat some oil to medium heat and add your Kievs. Turn them every couple of minutes until the breadcrumbs are golden. This should take about ten minutes.
If you have an aversion to fried food, you can oven-bake them. Preheat your oven to 200°C (428°F), and bake them for 20 minutes.
Serve the chicken Kievs
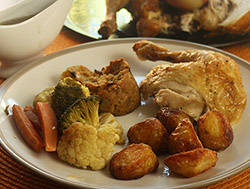
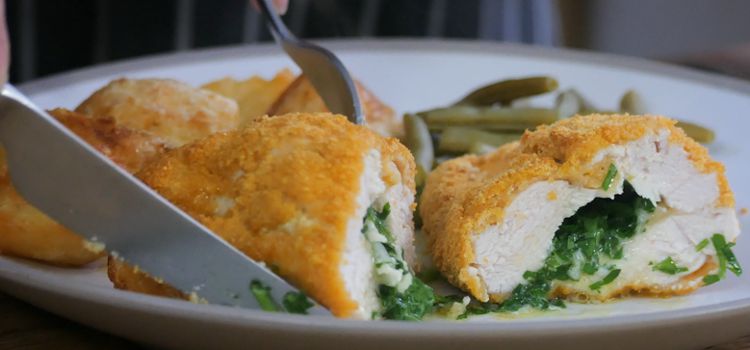
Serve with salad and roast potatoes. When you cut into a Kiev, you should be rewarded by a glorious spurt of hot garlic butter!
The video above is from the Keef Cooks YouTube channel. Click here to see the video recipe of Chicken Kiev on YouTube.
Related recipes from Keef Cooks
You might also like these recipes:
Ingredients & Info
 2 boneless, skinless chicken breasts
 50 grams unsalted butter
 2 cloves garlic, crushed
 1 small bunch parsley
PLUS
Plain (all-purpose) flour, beaten egg, and breadcrumbs to coat the Kievs. Oil to shallow-fry them.
Makes 2 servings
Prep time: 15 minutes.
Chilling time: 40 minutes.
Cooking time: 10 minutes.
Total time: 1 hour 35 minute.
Prep time: 15 minutes.
Chilling time: 40 minutes.
Cooking time: 10 minutes.
Total time: 1 hour 35 minute.
